All Insights

    [ DFM: injection molding optimization ]

    Injection Molding Optimization for Startups

    Technical primer on optimizing injection-molded parts for cost and manufacturability. Focused on starter tooling choices and common design fixes.

    Published

    April 9, 2026

    Reading Time

    12 min read

    Chapters

    7 guided sections

    Injection Molding Optimization for Startups

    [ Article Flow ]

    01

    Core Mechanics / How It Works

    02

    Cost & Timeline Realities

    03

    When to Use / When Not to Use

    04

    Common Mistakes & How to Avoid Them

    [ Introduction ]

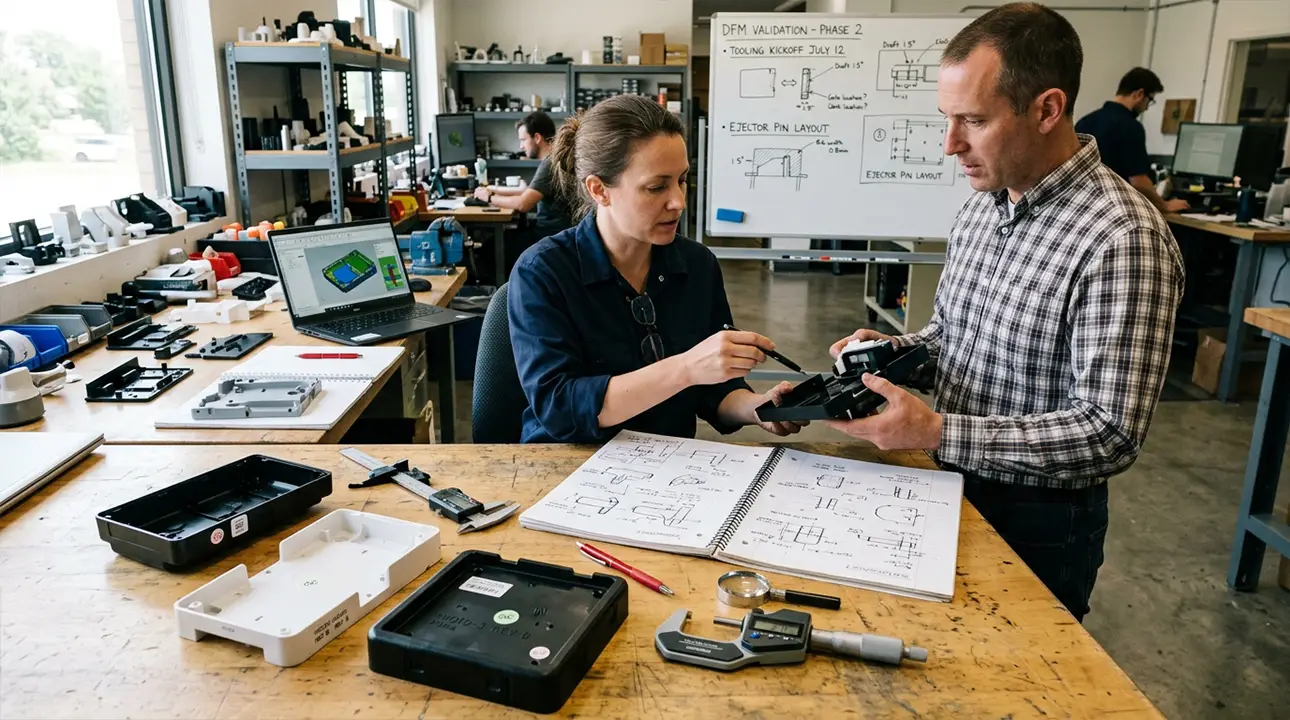
    Injection molding optimization is the practice of designing parts, selecting materials, and choosing tooling and process parameters so that molded components meet performance, cost, and timeline goals with minimal mold rework. For startups that ship small to mid volumes, the biggest savings come from early tooling decisions: choosing the right mold material, cavity count, gate strategy, and part geometry can save tens of thousands of dollars and avoid weeks of rework. This guide gives a practical, design-for-manufacturing (DFM) roadmap focused on early decisions that reduce tooling risk and lower total cost of ownership.

    Startups benefit most from injection molding optimization when engineering tradeoffs are mapped directly to tooling cost and product reliability. Read on for the mechanics of how molding behaves, realistic cost and timeline ranges for prototype and production tooling, a decision framework for when to invest in production tooling versus soft tooling or hybrid approaches, and a checklist you can use before sending any design to tooling. For an applied example, see how ONMOTIO optimized the KORU Air Purifier to cut BOM cost by 32 percent and reach tooling sign-off in 14 weeks.

    [ Chapter 01 ]

    Core Mechanics / How It Works

    Understanding the mechanics of injection molding is essential to solid DFM. Injection molding is a closed system that forces molten polymer into a steel or aluminum cavity where it cools and solidifies. Part geometry, wall thickness, gate location, runner design, material shrinkage, cooling system, and draft all interact to determine dimensional accuracy, cycle time, and probability of defects like sink, warp, and flash.

    Mold flow is governed by fluid mechanics and heat transfer. Melt front advancement depends on melt temperature, injection speed, and viscosity. As the polymer fills and cools, pressure is applied during packing to compensate for volumetric shrinkage. Cooling rate is the dominant factor for cycle time and crystallinity in semi-crystalline materials. Uneven cooling creates residual stresses that show up as warpage and dimensional drift.

    Key variables to monitor during DFM are:

    • Filling behavior: short shot risk and weld line formation.
    • Packing pressure and time: affects sink and internal voids.
    • Cooling uniformity: determines cycle time and warp.
    • Ejection behavior: undercuts and insufficient draft increase ejection force and risk of part damage.

    Key molding concepts every startup must know

    Every early-stage team needs a concise vocabulary to evaluate tradeoffs. Tooling refers to the manufactured mold, usually CNC-machined steel or aluminum. Cavity count is how many parts are produced per cycle. Gate type controls how melt enters the cavity and affects cosmetic finish and flow. Runners and cold slug wells influence material usage and runner returnability. Shot life or tool life is the expected number of cycles the mold will run before repair or replacement.

    Typical industry tolerances for molded parts depend on size and material. A conservative rule is ±0.005 in (±0.13 mm) for general features and ±0.002 in (±0.05 mm) for critical, tightly controlled features with proper GD&T. Cycle times vary with part size and cooling requirements but commonly fall between 10 s and 60 s for consumer hardware components.

    Design features that drive mold complexity and cost

    Complexity is the main cost driver in tooling. Features that add cost include deep undercuts, fine texturing, thin ribs, multiple actions (slides and lifters), and tight tolerance bosses that require side-actions or EDM. Overly articulated cosmetic surfaces force expensive polishing and additional machining passes. Every added action increases mold build time and alignment complexity, which directly raises the quoted tool price and lead time.

    Designing for minimal mold actions, using radiused features where possible, and consolidating parts via design-for-assembly (DFA) are high leverage ways to reduce complexity. In the KORU Air Purifier project ONMOTIO consolidated five snap-fit subassemblies into two molded parts and standardized fastener interfaces, enabling a simpler tool with fewer side actions and contributing to the 32 percent BOM reduction.

    Draft, wall thickness, ribs, and gate decisions

    Draft reduces friction during ejection. Standard draft for textured surfaces is 1.5 to 3 degrees, and 0.5 to 1.5 degrees for polished surfaces, but these values depend on feature height and material. Wall thickness should be uniform across the part to avoid sink and avoid excessive material use. Typical nominal wall thickness for small consumer housings is 1.5 to 3.0 mm. Ribs can provide stiffness but must be no more than 60 percent of adjacent wall thickness to prevent sink. Gate selection - direct, tab, hot tip, submarine - is driven by part geometry, cosmetic requirements, and cycle optimization.

    For small startup runs, gate location often balances cosmetic needs with filling concerns. An inconspicuous gate placed in a low-stress area with a short flow path reduces the chance of short shots and weld lines while keeping cosmetic issues minimal.

    Avoiding sink, warp, and ejection issues

    Sink appears where thick sections cool and shrink internally. Counter this with uniform wall thickness, strategic ribs to support thicker bosses, and optimized packing. Warp is usually caused by asymmetric cooling or knit line placement. Implement balanced fill paths, conformal cooling where justified, and minimize overmolding or inserts that create uneven cross sections.

    Ejection problems are common when draft is insufficient. Increase draft, add ejector pin bosses at structurally sound locations, and avoid living hinges or thin cantilevered features that flex during ejection. For parts with required tight flatness, consider additional cooling time or precision post-molding planarity operations.

    [ Chapter 02 ]

    Cost & Timeline Realities

    Realistic cost estimates and timelines are critical for startups that must balance speed to market with capital constraints. Tooling cost is driven by cavity count, steel hardness, number of actions, and precision requirements. Typical ranges are:

    Tool TypeTypical CostLead TimeTool Life (shots)
    Prototype aluminum mold$3,000 - 5,0002 - 6 weeks1,000 - 10,000
    Production steel mold (single cavity) 2,000 - $60,0008 - 16 weeks100,000 - 1,000,000
    Multi-cavity steel mold (complex)$40,000 - $200,000+12 - 24 weeks100,000 - 1,000,000+

    Per-part molding costs depend on cycle time, material, and amortized tooling cost. For small runs (1,000 to 10,000 parts), expect molding and material costs of $0.50 to 5 per part depending on part size. For molded parts with simple geometry and commodity thermoplastics like ABS or PC, a realistic per-part figure for medium-sized housings is $2 to $6 at low volumes.

    Tool revisions are the main hidden cost. Typical causes include poor gate placement, inadequate draft, unexpected warp, or incorrect tolerances. A mold rework cycle can add 2 to 8 weeks and $2,000 to $20,000 depending on the fix. The KORU Air Purifier tooling sign-off in 14 weeks demonstrates what is possible when DFM is applied early and rework is minimized. That project avoided a second tooling pass by addressing draft and gate strategy during the first tool design review.

    Materials and finish choices also affect cost. Texturing increases machining and polishing time and can add ,000 to 0,000 to the tooling quote depending on area and depth. Choosing a glossy finish with tight cosmetic tolerances increases inspection time and may require secondary polishing.

    💡 Early investment in a clear DFM checklist often saves more than the cost of an additional engineering hour during the tooling bid stage.

    [ Chapter 03 ]

    When to Use / When Not to Use

    Deciding whether to proceed with injection molding, and how to configure tooling, depends on volume, product lifetime, and cost sensitivity. Use injection molding when you expect reliable volume above break-even for tooling amortization, need repeatable precision, and require parts with specific mechanical properties or integrated features.

    A simple decision framework:

    ScenarioRecommendationRationale
    Expected volume < 500 unitsAvoid production tooling. Use CNC or urethane castingHigh tooling amortization, faster time to iterate
    Volume 500-5,000Consider prototype aluminum or soft tooling, or multi-shot molds with low cavity countBalances lower tooling cost with acceptable per-part price and speed to market
    Volume 5,000-50,000Production steel mold, single or multi-cavityTooling amortization works, cycle time improvements reduce per-part cost
    Volume > 50,000Multi-cavity steel molds and automationInvest in higher upfront tooling for lower per-part cost and efficiency

    When not to use injection molding: when designs are highly iterative in form, when parts need extremely tight tolerances without proven process capability, or when the supply chain needs pivotability in material selection that is better served by additive or machined parts.

    ⚠️ Rushing into steel production tooling to meet a launch date often costs more than using a prototype mold and delaying launch by a few weeks. Balance speed with the risk of rework.

    [ Chapter 04 ]

    Common Mistakes & How to Avoid Them

    Startups often make the same mistakes that lead to expensive fixes. The most common are inadequate draft, nonuniform wall thickness, underestimating cosmetic requirements, and late changes to tolerance-critical features after tooling is committed. Ejection problems and sink marks also appear frequently when design and pack parameters are not validated.

    Avoid these mistakes by aligning design decisions with tooling impact during concept review. Hold a formal DFM session before outsourcing tooling quotes. That session should include the mold designer, process engineer, and a manufacturing vendor representative. Use moldflow simulation to surface fill and pack concerns early, but do not rely on simulation alone; validate with physical rapid prototypes.

    • Checklist for avoiding common mistakes:
    • Confirm minimum draft angles for all faces and note texture requirements.
    • Validate wall thicknesses and rib dimensions with a rule of thumb matrix tied to material selection.
    • Identify all undercuts and decide whether to redesign, use collapsible cores, or accept side actions with cost implications.
    • Lock tolerance-critical features and produce a GD&T drawing for tooling vendors.
    • Run moldflow on the final CAD and iterate gate location and cooling channels.

    💡 For KORU Air Purifier we documented critical GD&T for filter interface surfaces and rebalanced wall thickness to eliminate sink on the main shell, preventing two likely rework cycles and enabling tooling sign-off in 14 weeks.

    ⚠️ Common hidden cost: late cosmetic edits. Texturing and rework for appearance can add weeks and $5,000 to $20,000 to tooling cost.

    [ Chapter 05 ]

    Tooling strategies: single vs multi-cavity and mold materials

    Selecting single versus multi-cavity molds and the mold material are early decisions with high impact. Single cavity steel molds are cheaper and faster to machine but produce fewer parts per cycle, increasing per-part amortized cost. Multi-cavity molds increase cycle output but raise complexity, balancing, and maintenance needs.

    StrategyUpfront CostPer-part Cost at 10k partsLead TimeProsCons
    Single-cavity steel 2k - $60kModerate8 - 16 weeksSimpler, easier to iterateLower throughput per cycle
    2-4 cavity steel$25k - 20kLower10 - 18 weeksHigher throughput, lower per-part amortizationBalancing runners, more maintenance
    Prototype aluminum$3k - 5kHigh2 - 6 weeksFast, low upfront, good for validationShort tool life, limited finish options

    Mold material selection also affects thermal behavior. Aluminum is easier to machine and cheaper, but conducts heat differently and wears faster. Steel provides longevity and stability for tight tolerances. For startups that anticipate design iteration, an aluminum prototype tool or a low-cavity steel pre-production tool often makes sense.

    💡 If your first production run is under 10,000 parts, seriously evaluate an aluminum or hybrid approach to limit upfront capital and validate assembly and supply chain before committing to hardened steel.

    [ Chapter 06 ]

    Checklist for DFM review before tooling

    A focused DFM review prevents the most costly surprises. Use this checklist before issuing drawings to tooling vendors. Keep a single list for each part and attach a concise GD&T drawing.

    • Confirm expected production volume and preferred tooling lifecycle.
    • Freeze materials and ensure supplier availability for chosen resins.
    • Verify uniform wall thickness targets and rib dimensions per material.
    • Define draft angles by face and surface finish by area.
    • Mark all undercuts, insert locations, and decide on core actions required.
    • Specify gate type and tentative location, noting cosmetic priorities.
    • Provide tolerances, critical GD&T, and assembly references.
    • Run moldflow and document expected fill, weld lines, and packing pressures.
    • Agree on inspection points and first article criteria.
    • Plan for a contingency budget of 5 to 20 percent of tooling cost for minor rework.

    [ FAQ ]

    Common Questions

    Injection molding optimization is the process of aligning part design, material, and tooling decisions to meet cost, quality, and timeline goals. For startups it reduces expensive rework, shortens time to market, and minimizes tooling amortization risk.

    Standard tolerances are around ±0.005 in (±0.13 mm) for general features. Critical features with precise GD&T can reach ±0.002 in (±0.05 mm) with the right tool design and process control.

    Run a formal DFM review, lock critical dimensions early, use moldflow analysis plus physical prototypes, and invest in tooling design reviews with your molder. Budget 5 to 20 percent of tooling cost for contingency.

    Prototype aluminum molds typically cost $3,000 to 5,000 and take 2 to 6 weeks. Production steel molds range from 2,000 to $200,000+ depending on complexity and can take 8 to 24 weeks.

    Use aluminum tooling for validation runs and early production under ~10,000 parts or when you need quick iterations. Use steel tooling when you expect high volumes, require tight tolerances, or need durable textures and finishes.

    O

    [ Author ]

    ONMOTIO Team

    ONMOTIO's editorial and engineering team writes about industrial design, mechanical engineering, prototyping, and what it actually takes to move a physical product toward manufacturing.

    READY TO BUILD
    IT RIGHT?

    Let's turn your idea into a manufacturable, market-ready product.

    START A PROJECT